Crochet!
- 30 Dec 2024
Crochet!
Why
I have always been interested and intrigued by crocheting. I have stared in awe when my partner does it and the way the needle just keeps moving around with such ease. I gave it a try about a year ago and in theory I understood the basic concept - You make sure the hook end is aligned with the stretch of the hole and pull it through. But when I tried it, it was just too hard for my fingers to understand and I pushed it off to later.
About a week ago, I got the chance to crochet with a full kit and I jumped on the opportunity. I did’nt really like the patterns that came with the kit and I looked around youtube and found a pattern for a cute little turtle and decided I was going to make it.
How
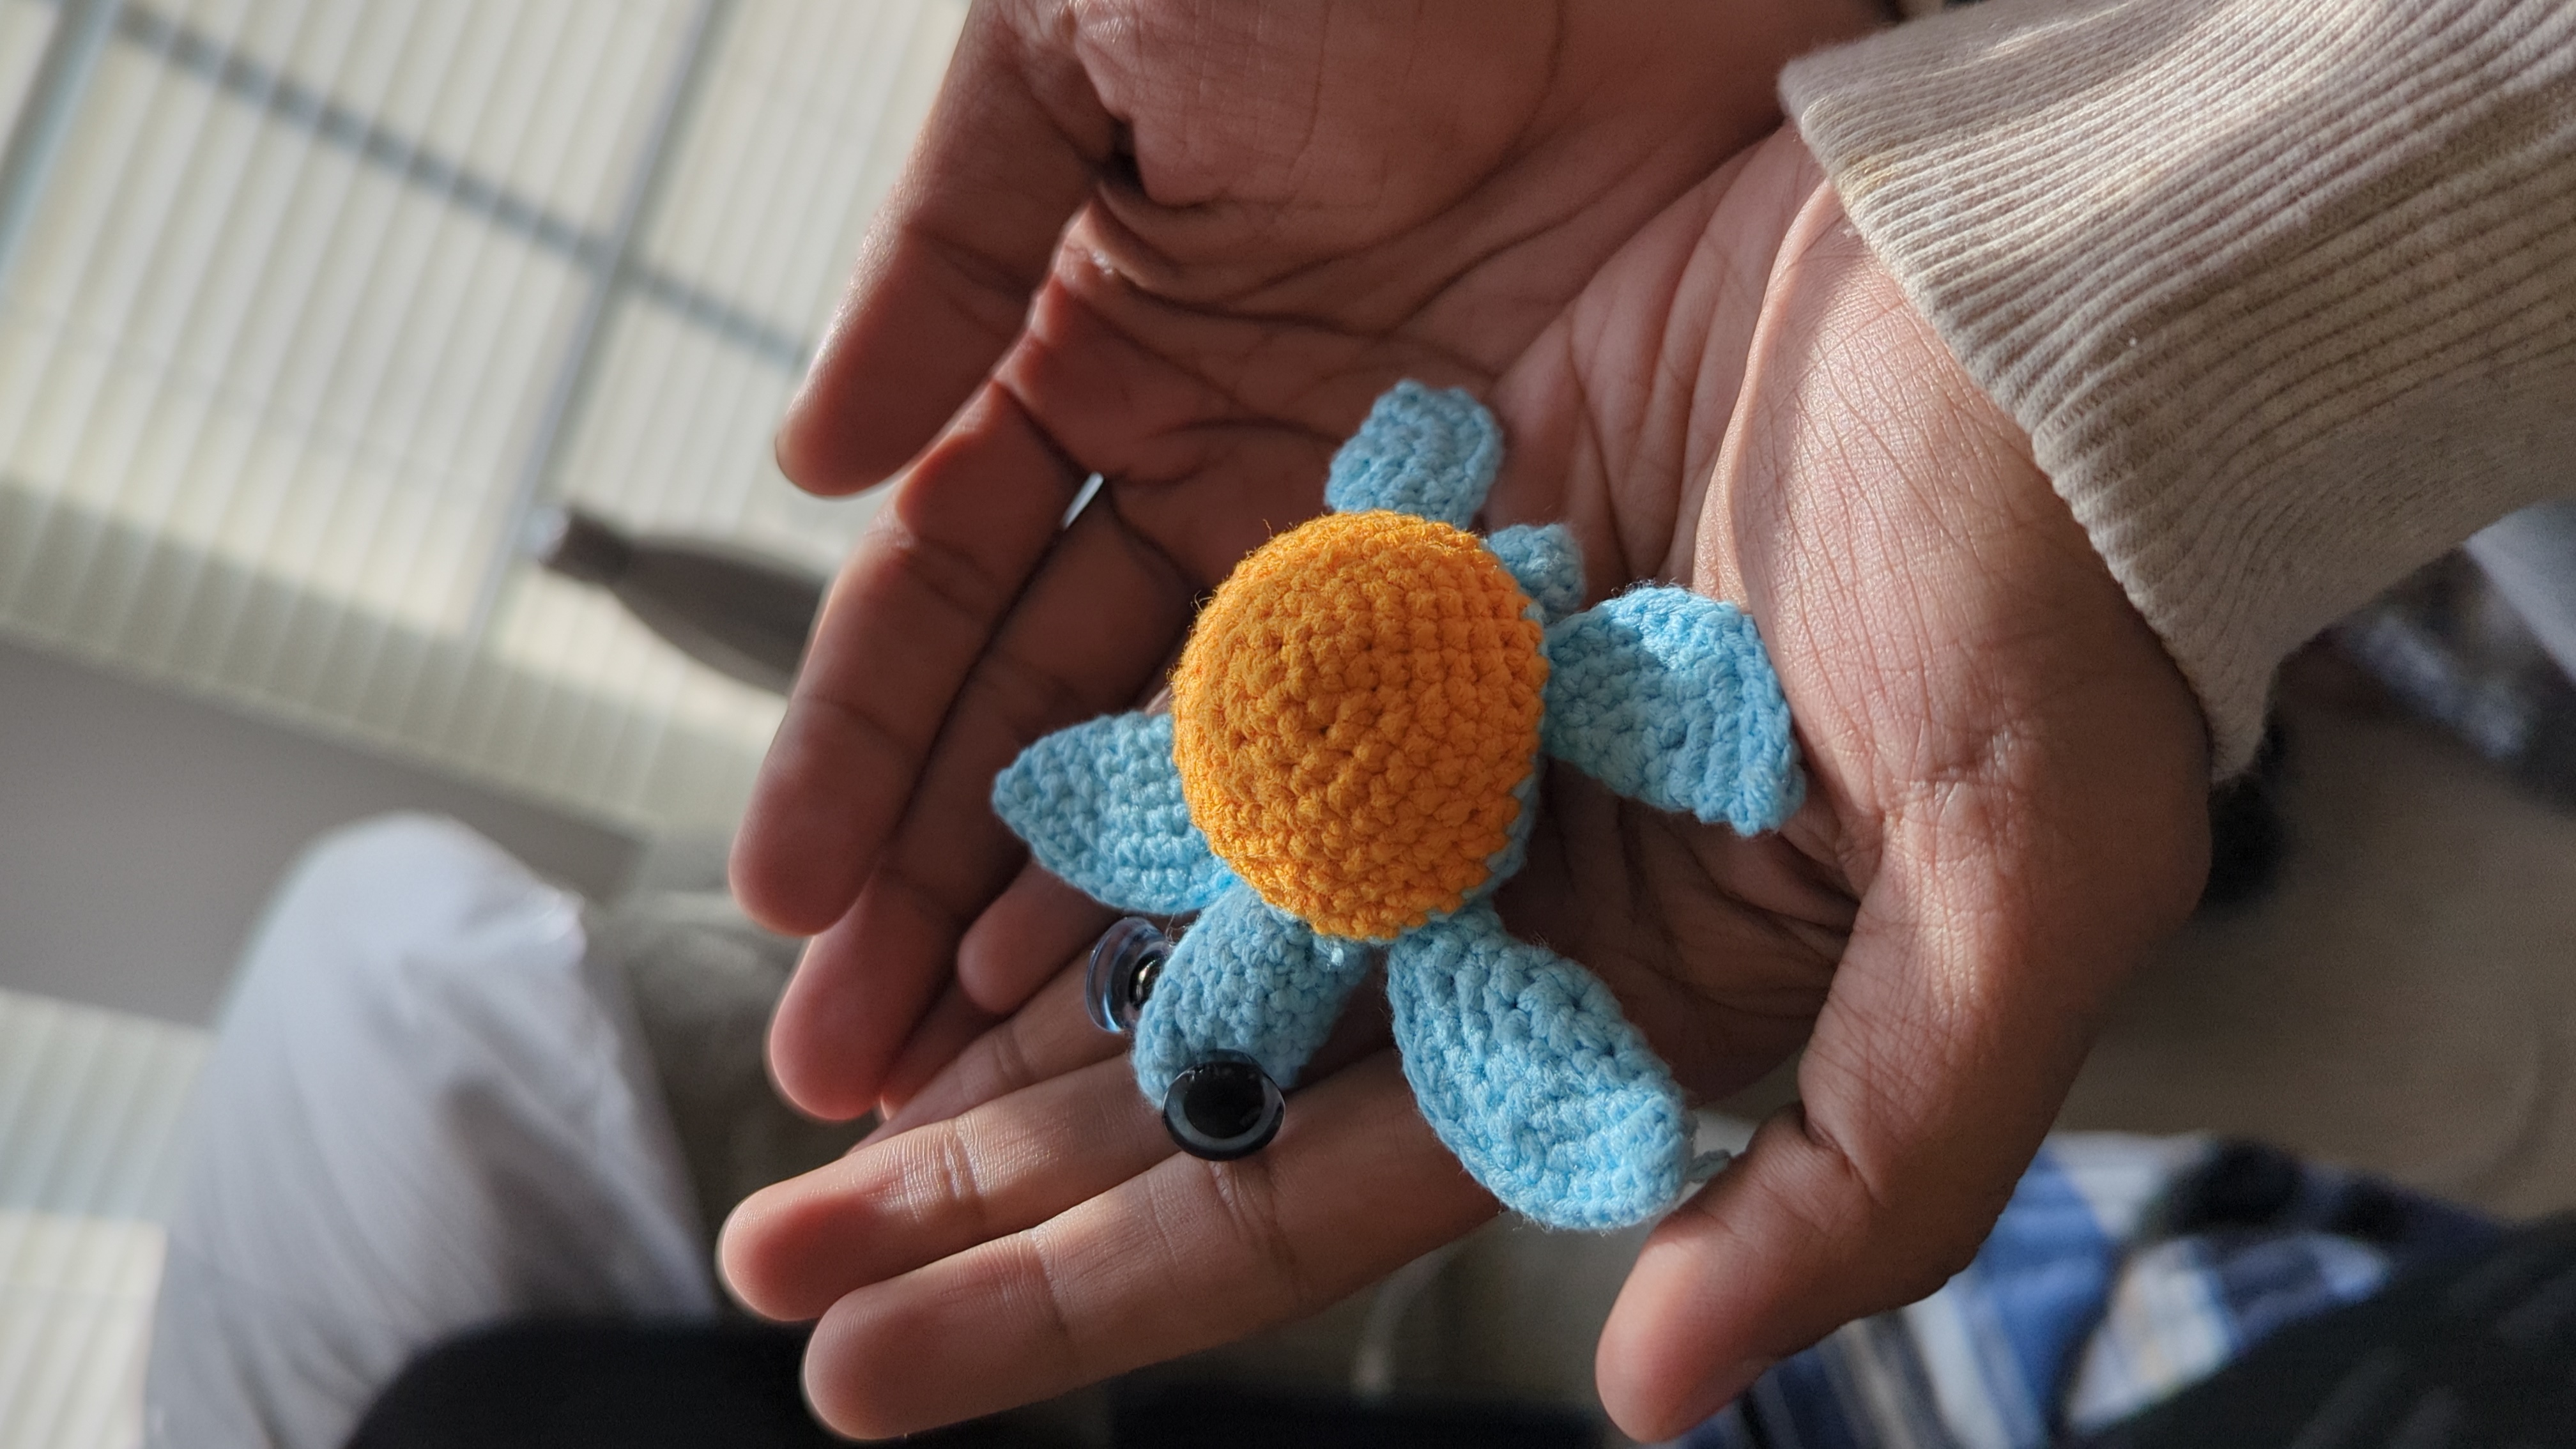
So the pattern goes like this, you make the head, the tail and the hands, legs and then the shell.
Every part starts as a magic ring and then starts deviating. I started with the head and I didn’t know if it would be easier this time around and went into it, and it was not. The pattern was supposed to be a sphere with 5 increase lines and 4 decrease lines (Don’t worry even I did’nt know what these meant till later) . But somewhere aleng the video I missed the tutorial and went into the fin section and my head ended up looking a bit elongated. I took 2 hours two days to do this. But I realized that I had gotten so much better at the knitting pattern and was speeding up significantly. The eyes I had were a but too large for my thread size, so I had to wrestle with the threads to get them in.
Next I then made the tail, which was just 4 increase lines starting from 7. This looked much better than the head because I followed the tutorial word for word.
But deviating from the actual tutorial I started building the shell, as I had somehow missed the fins and skipped them from the previous mishap. But surprisingly the shell turned out to be so much more simpler and straightforward. The pattern was a magic ring starting from 7 and doing 5 increases till 35 with the shell color, then switching to the body color thread (you don’t finish it fully, but end it with a small hole in the bottom so that the other parts can be stitched in). At around line 4, we leave 5 holes for the turte. one for the tail, and four for the fins/arms,legs by skipping some loops (You don’t go within the earlier stitches and do a normal chain) . By this point I had realized what increases and decreases were and I learnt how to do a vanishing decrease in a different tutorial. This gave me good confidence with the needle and I also tried a different sized needle around the same time to see which felt right and this made me feel very sophisticated.
Then I went into the fins (arms and legs?) of the turtle. This started out as magic circles of size 6 then we do 4 increases for the back fins and 5 increses for the front fins as they are slightly larger. We make two smaller ones and two larger ones. Then we fold one of each size in half and then pull the thread through a needle from one side to the other. so that we have two symmetrical sets. ( These fins are literally the cutest and at this point I had the technique down and could do it pretty fast)
The final part was bringing it all together. I sewed in the front and back legs through their designated holes in the shell, and then sewed the head into the body. At this point the turtle was starting to look really cute and I was very excited. You tie the entire piece together by stuffing the head and body with cotton ( But I used thread because, I couldn’t reach the cotton in the middle of the night but I wanted it done) Then you finish the shell and ta-da you have the full piece ready.
I was really really surprised by how good it looked ( partly because I made it and my partner said it looked like the cyoot baby turtle from neemo ) for a first crachet thing I made. But I went through the comments section of youtube and the video had very bad reviews saying people couldn’t follow it and the instructions were unclear. But for me I guess I did not know what I did not and that stopped me from thinking I shouldn’t try it out.
Things I learnt
- Crochet - pulling thread from one side of a loop to the other and making cyoot art pieces.
- Important part of crochet - If you want the pieces to be together, you have to pull your loop through your previous stitches. The idea is you put the hook through the previous stitch, pull the free thread once ( so the new thread is between your old loop and the previous loop,) then you pull the free end once more through both the loops, so you end up with one final loop. ( might sound complicated but is very simple, look it up)
- Magic Ring - A structure that becomes a ring once you pull both ends and is used a building block for a lot of patterns
- Line - One iteration of the loop pattern.
- Increase - Pattern where you increase the number of loops compared to the previous round. For example if you start out with 6 loops, you do 12 in the next round, 18 in the third round and so on. Usually how you do this is, when you start, you do two loops through one previous stitch every other loop, then you move on to do two normal, then a double loop, then three normal and a double loop and so on.
- Decrease - Pattern where you decrease the number of loops compared to the previous round. For example if are at 24, you decrease to 18, then to 12 and so on. The idea here is to do it in such a way that it is not obvious to the looker.
- Color switch - you pull the free end of a different color through your last loop so that you get a new color for the rest of the stitch. People even switch between colors to get alternating patterns and stuff.
- Stitch - you literally take a stitching needle and stitch stuff in.
- Skill - stuff you learn when you put in patience and overcome frustration.
The full turtle pattern
- Head - A sphere starting as a magic ring starting with 7 loops with 5 increase lines and 4 decrease lines. ( use vanishing decreases for clean output )
- Tail - A magic ring starting with 7 loogs with 4 increase lines resulting in a cut sphere
- Front Legs - Magic ring starting with 6 loops, with 5 increase lines, with the final line being a folded linking line, stitched through the middle for one to get symmetric legs
- Back Legs - Magic ring starting with 6 loops, with 4 increase lines, with the final line being a folded linking line, stitched through the middle for one.
- Body - Magic ring starting from 7 and doing 5 increases till a total of 35 with the shell color, then switching to the body color thread. At around line 4, we leave 5 holes for the turte. one for the tail, and four for the fins/arms,legs by skipping some loops
If there is one moral lesson learnt from this, don’t stop something before you have actually tried it out and given your all. You never know what you are good at and what life will throw at you ( hopefully it’s a cyoot baby turtle ). I am really really happy with the way it turned and will build more, but the first make of anything is always the best. The next thing I want to try is an octopus from the same person.
P.S: I have called the crochet hook a needle everywhere.